

Managing MCP Clients
To maintain security and control over your MCP Server, you need to manage which client applications can access it. Scalekit provides several ways for clients to connect, including automatic registration for modern apps and manual pre-registration for custom or trusted clients.
This guide covers the different types of MCP clients and shows you how to:
- View all registered clients
- See which users have granted consent to a client
- Revoke user access for any client
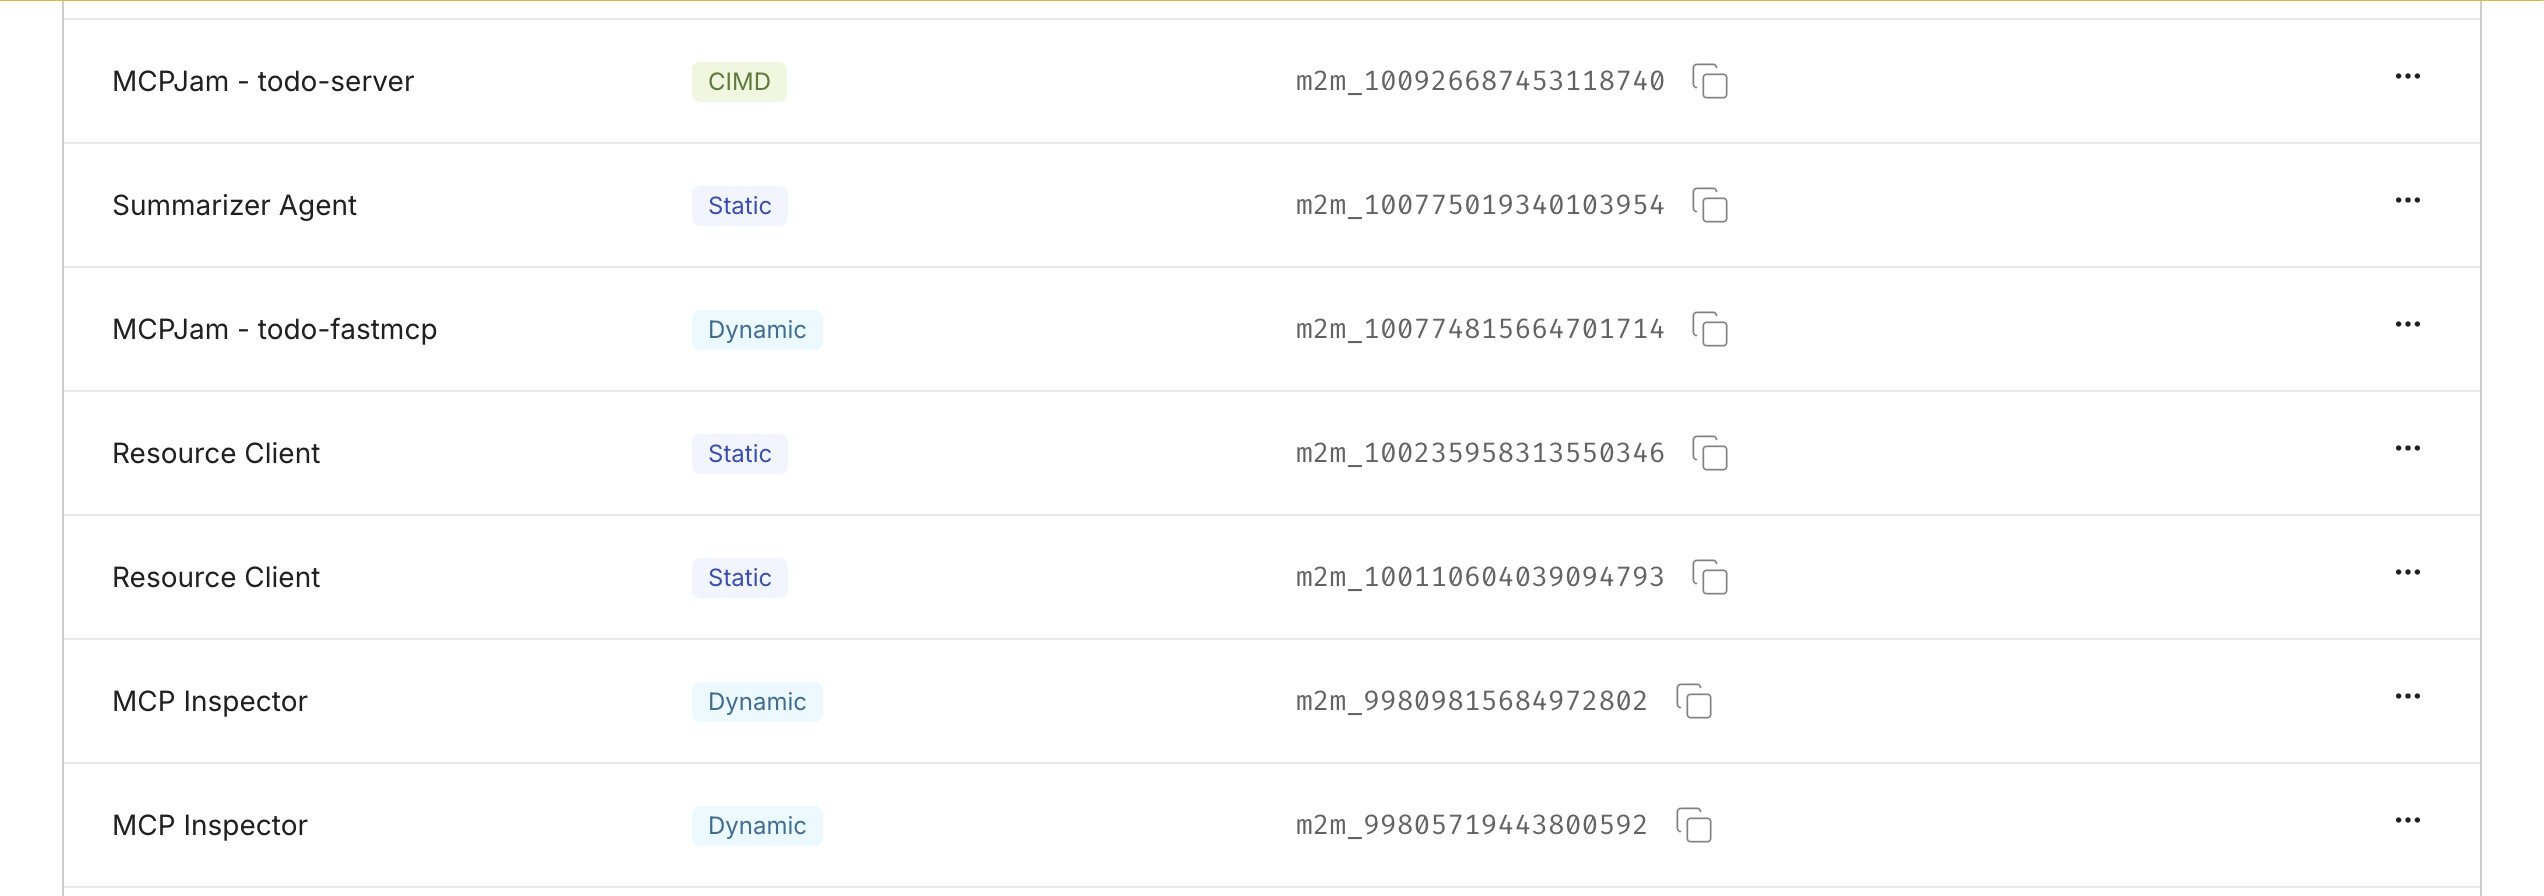
There are three main categories of MCP Clients that can interact with your MCP Server:
1. Automatic registration with DCR
Section titled “1. Automatic registration with DCR”These are MCP Clients that automatically register themselves as OAuth clients. Most modern MCP clients, such as Claude Desktop, OpenAI, VS Code, and Cursor, support Dynamic Client Registration (DCR). They initiate the registration process and start the OAuth Authorization flow with the Scalekit server to obtain an access token without requiring manual configuration.
2. Manual client pre-registration
Section titled “2. Manual client pre-registration”These are MCP Clients that you manually register in the Scalekit Dashboard. This is useful when you want to restrict access to specific, pre-approved clients or when you are building a custom client that requires fixed credentials. You can create OAuth clients that can either act as themselves or on behalf of the user.
How to pre-register a client
Section titled “How to pre-register a client”If you need to manually register an MCP Client, you can do so in the Scalekit Dashboard.
-
Navigate to the Clients section of your MCP Server.
-
Click the Create Client button.
Configuration:
- Client name: A display name (e.g., “My Custom Client”).
- Redirect URI: The URL where the client will redirect users after authorization.
-
Choosing the right OAuth flow:
- For Client Credentials Flow: Leave the Redirect URI field empty. Your application will authenticate using only the
client_idandclient_secret. This is suitable for server-to-server communication. - For Authorization Code Grant Flow: Provide one or more Redirect URIs where users will be redirected after granting consent. This is required for user-facing applications that need to act on behalf of users.
Once the client is created, you will receive a
client_idandclient_secretto configure in your application.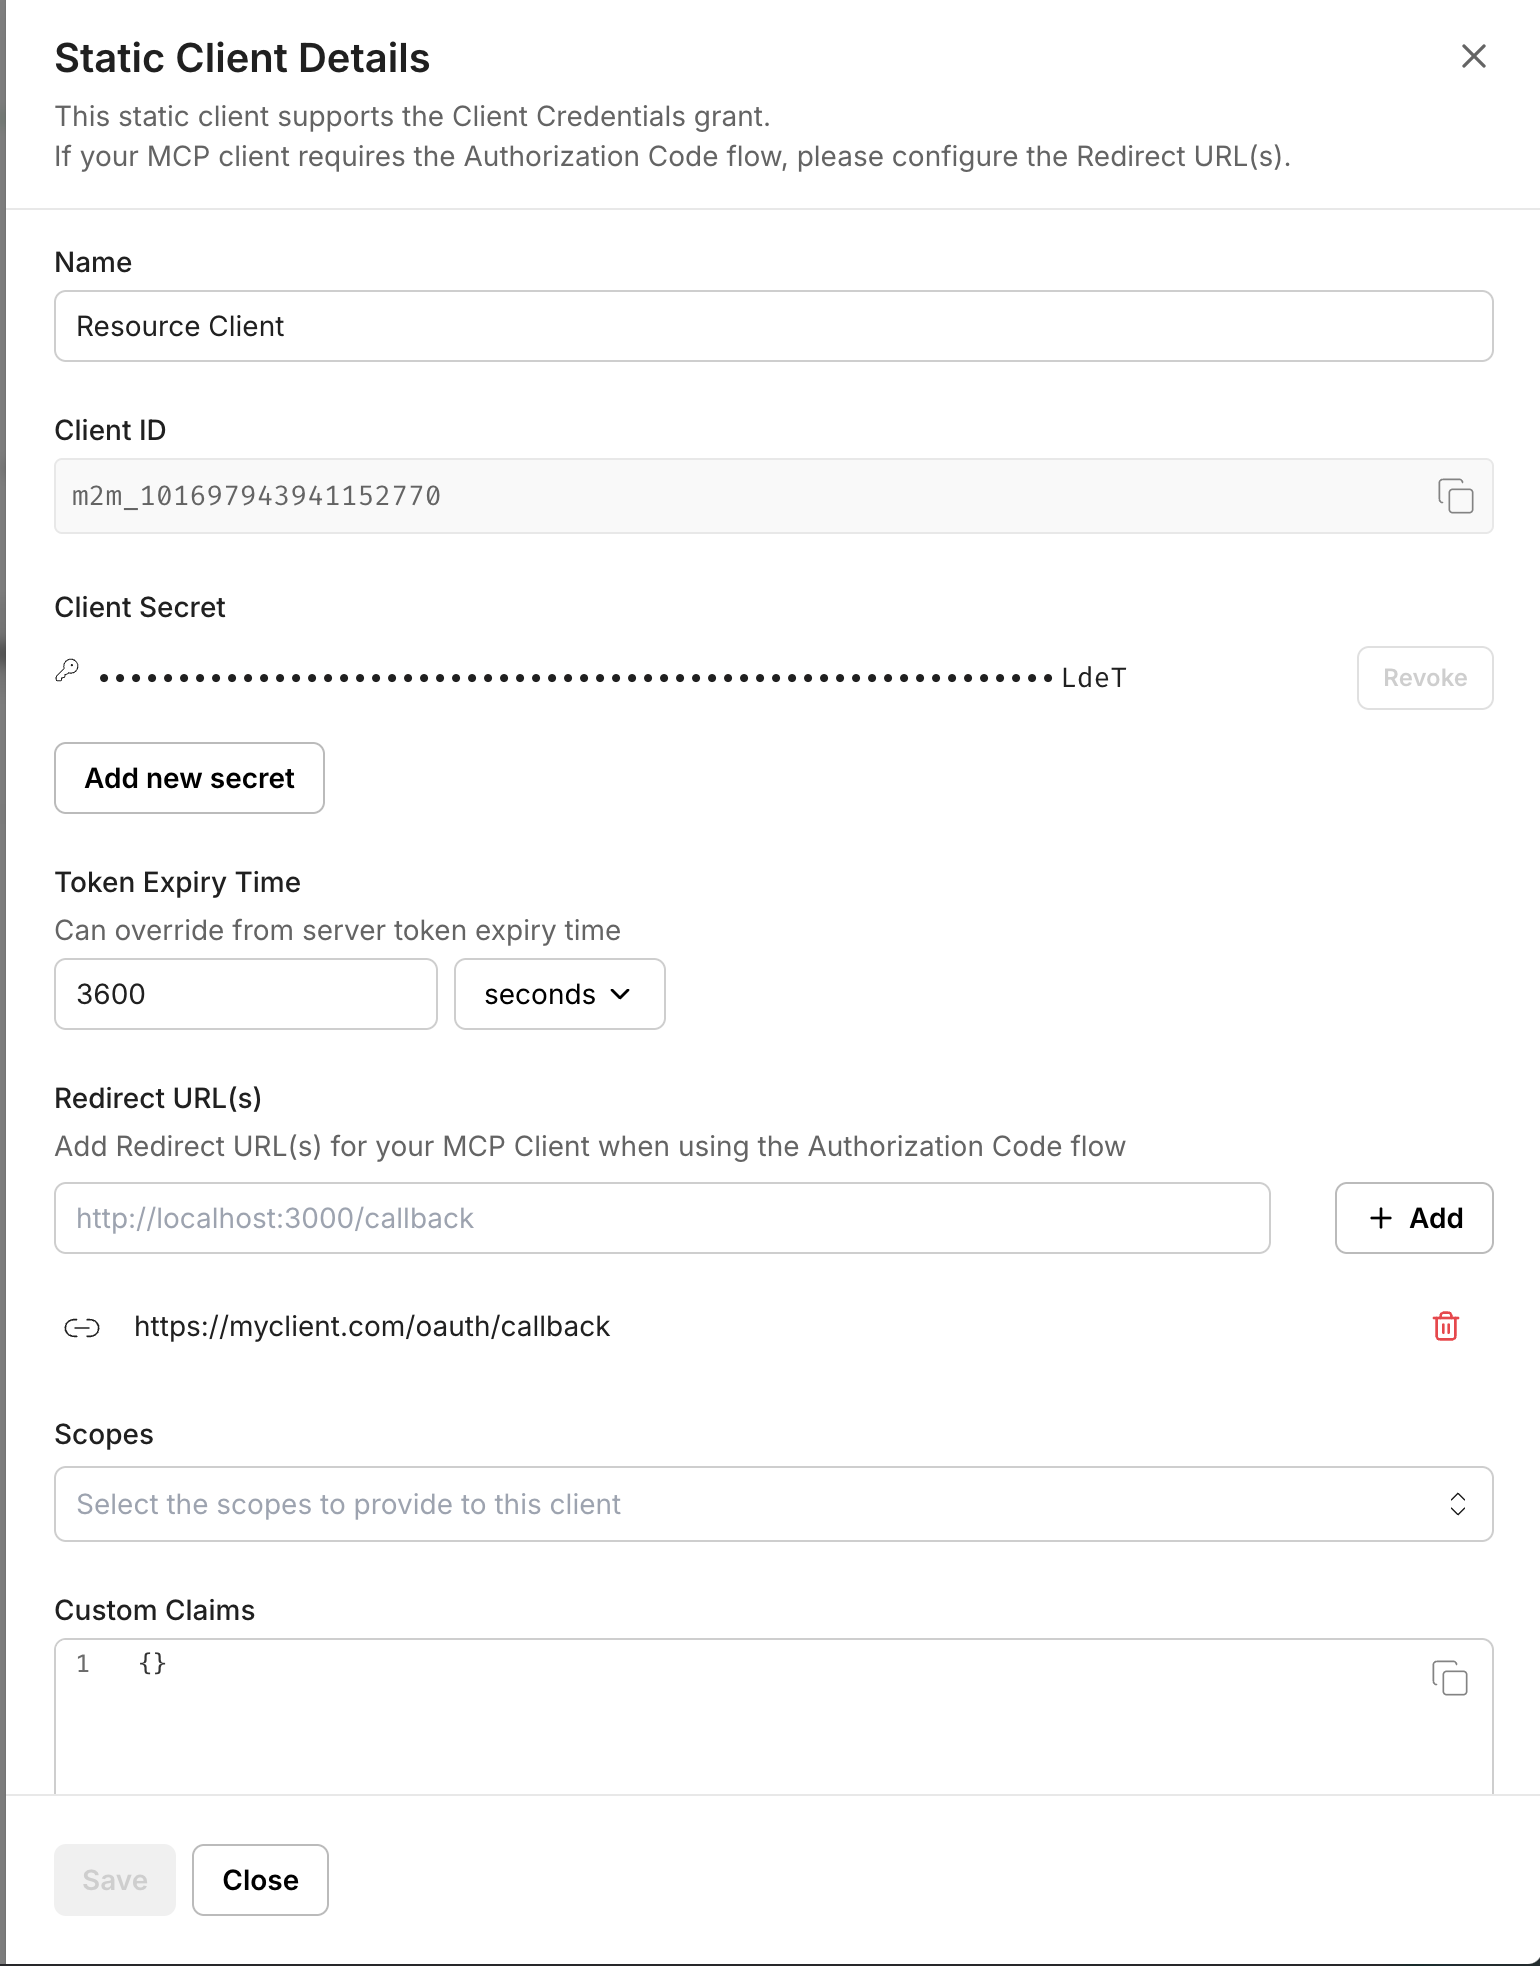
- For Client Credentials Flow: Leave the Redirect URI field empty. Your application will authenticate using only the
2.1 OAuth client credential flow
Section titled “2.1 OAuth client credential flow”Use this flow when your MCP Client needs to act on its own behalf rather than on behalf of a specific user. This is ideal for machine-to-machine communication scenarios.
When to use:
- Backend services or server-side applications
- Automated scripts or batch processes
- System integrations that don’t require user interaction
- Applications that need to access resources without user context
Characteristics:
- No user interaction required
- No redirect URI needed
- Client authenticates using
client_idandclient_secret - Access token represents the client itself
2.2 OAuth authorization code grant flow
Section titled “2.2 OAuth authorization code grant flow”Use this flow when your MCP Client needs to act on behalf of a user. This is the standard OAuth flow that requires user consent.
When to use:
- User-facing applications (web, desktop, or mobile)
- Applications that need to access user-specific resources
- Scenarios requiring explicit user consent
- Applications where actions should be attributed to specific users
Characteristics:
- Requires user authentication and consent
- Redirect URI is mandatory
- Client receives authorization code, exchanges it for access token
- Access token represents the user’s authorization
3. Registration via metadata URL (CIMD)
Section titled “3. Registration via metadata URL (CIMD)”These are MCP Clients that support Client ID Metadata Document (CIMD), an OAuth 2.0 mechanism that allows clients to use a URL as their client identifier. When a CIMD-compatible client initiates the OAuth flow, Scalekit fetches the client’s metadata (such as name, redirect URIs, and other registration information) from the provided URL. This provides an alternative registration method without requiring manual pre-registration or Dynamic Client Registration, making it easier for clients to authenticate across different authorization servers.
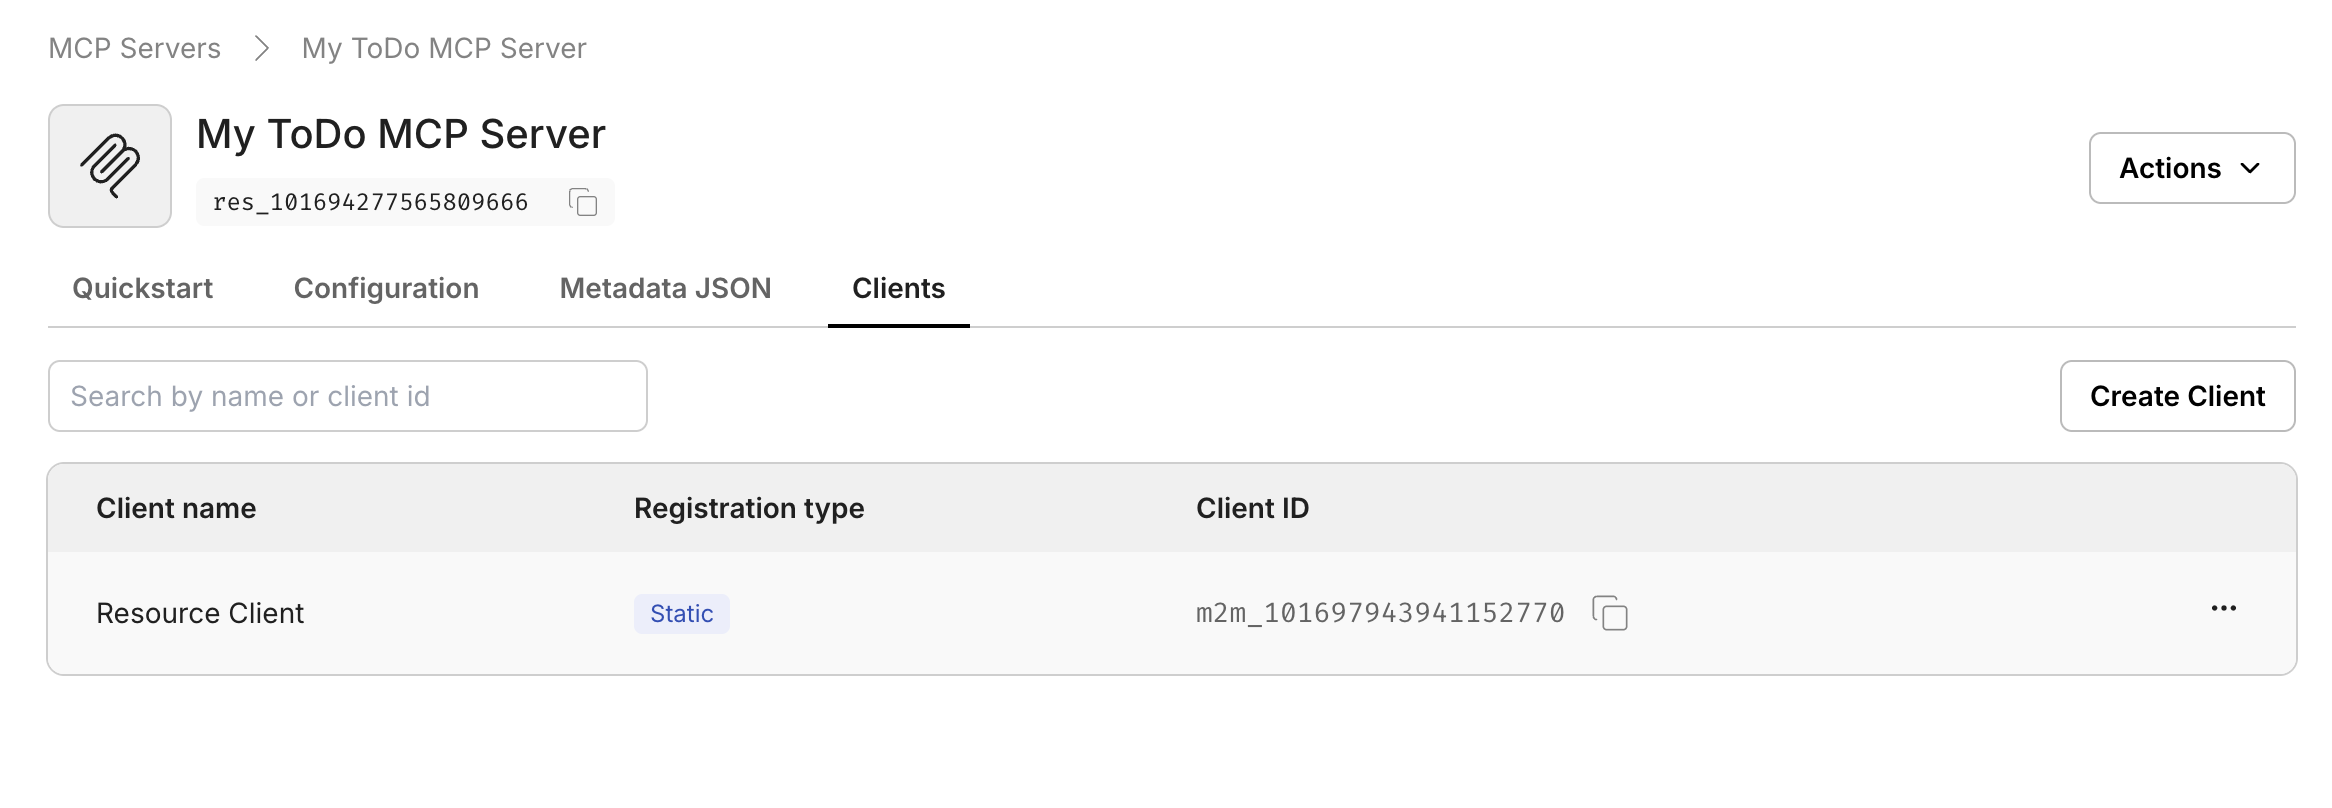
Manage registered clients
Section titled “Manage registered clients”View all registered clients
Section titled “View all registered clients”You can view a list of all MCP Clients that have been registered with your MCP Server (both DCR and pre-registered) in the Scalekit Dashboard.
- Go to your MCP Server in the dashboard.
- Click on the Clients tab.
View consented users
Section titled “View consented users”For each registered MCP Client that uses the OAuth Authorization Code Grant Flow, you can view all users who have granted consent.
- From the Clients list, click on a specific client.
- Navigate to the Consents tab to see the list of users who have authorized this client.
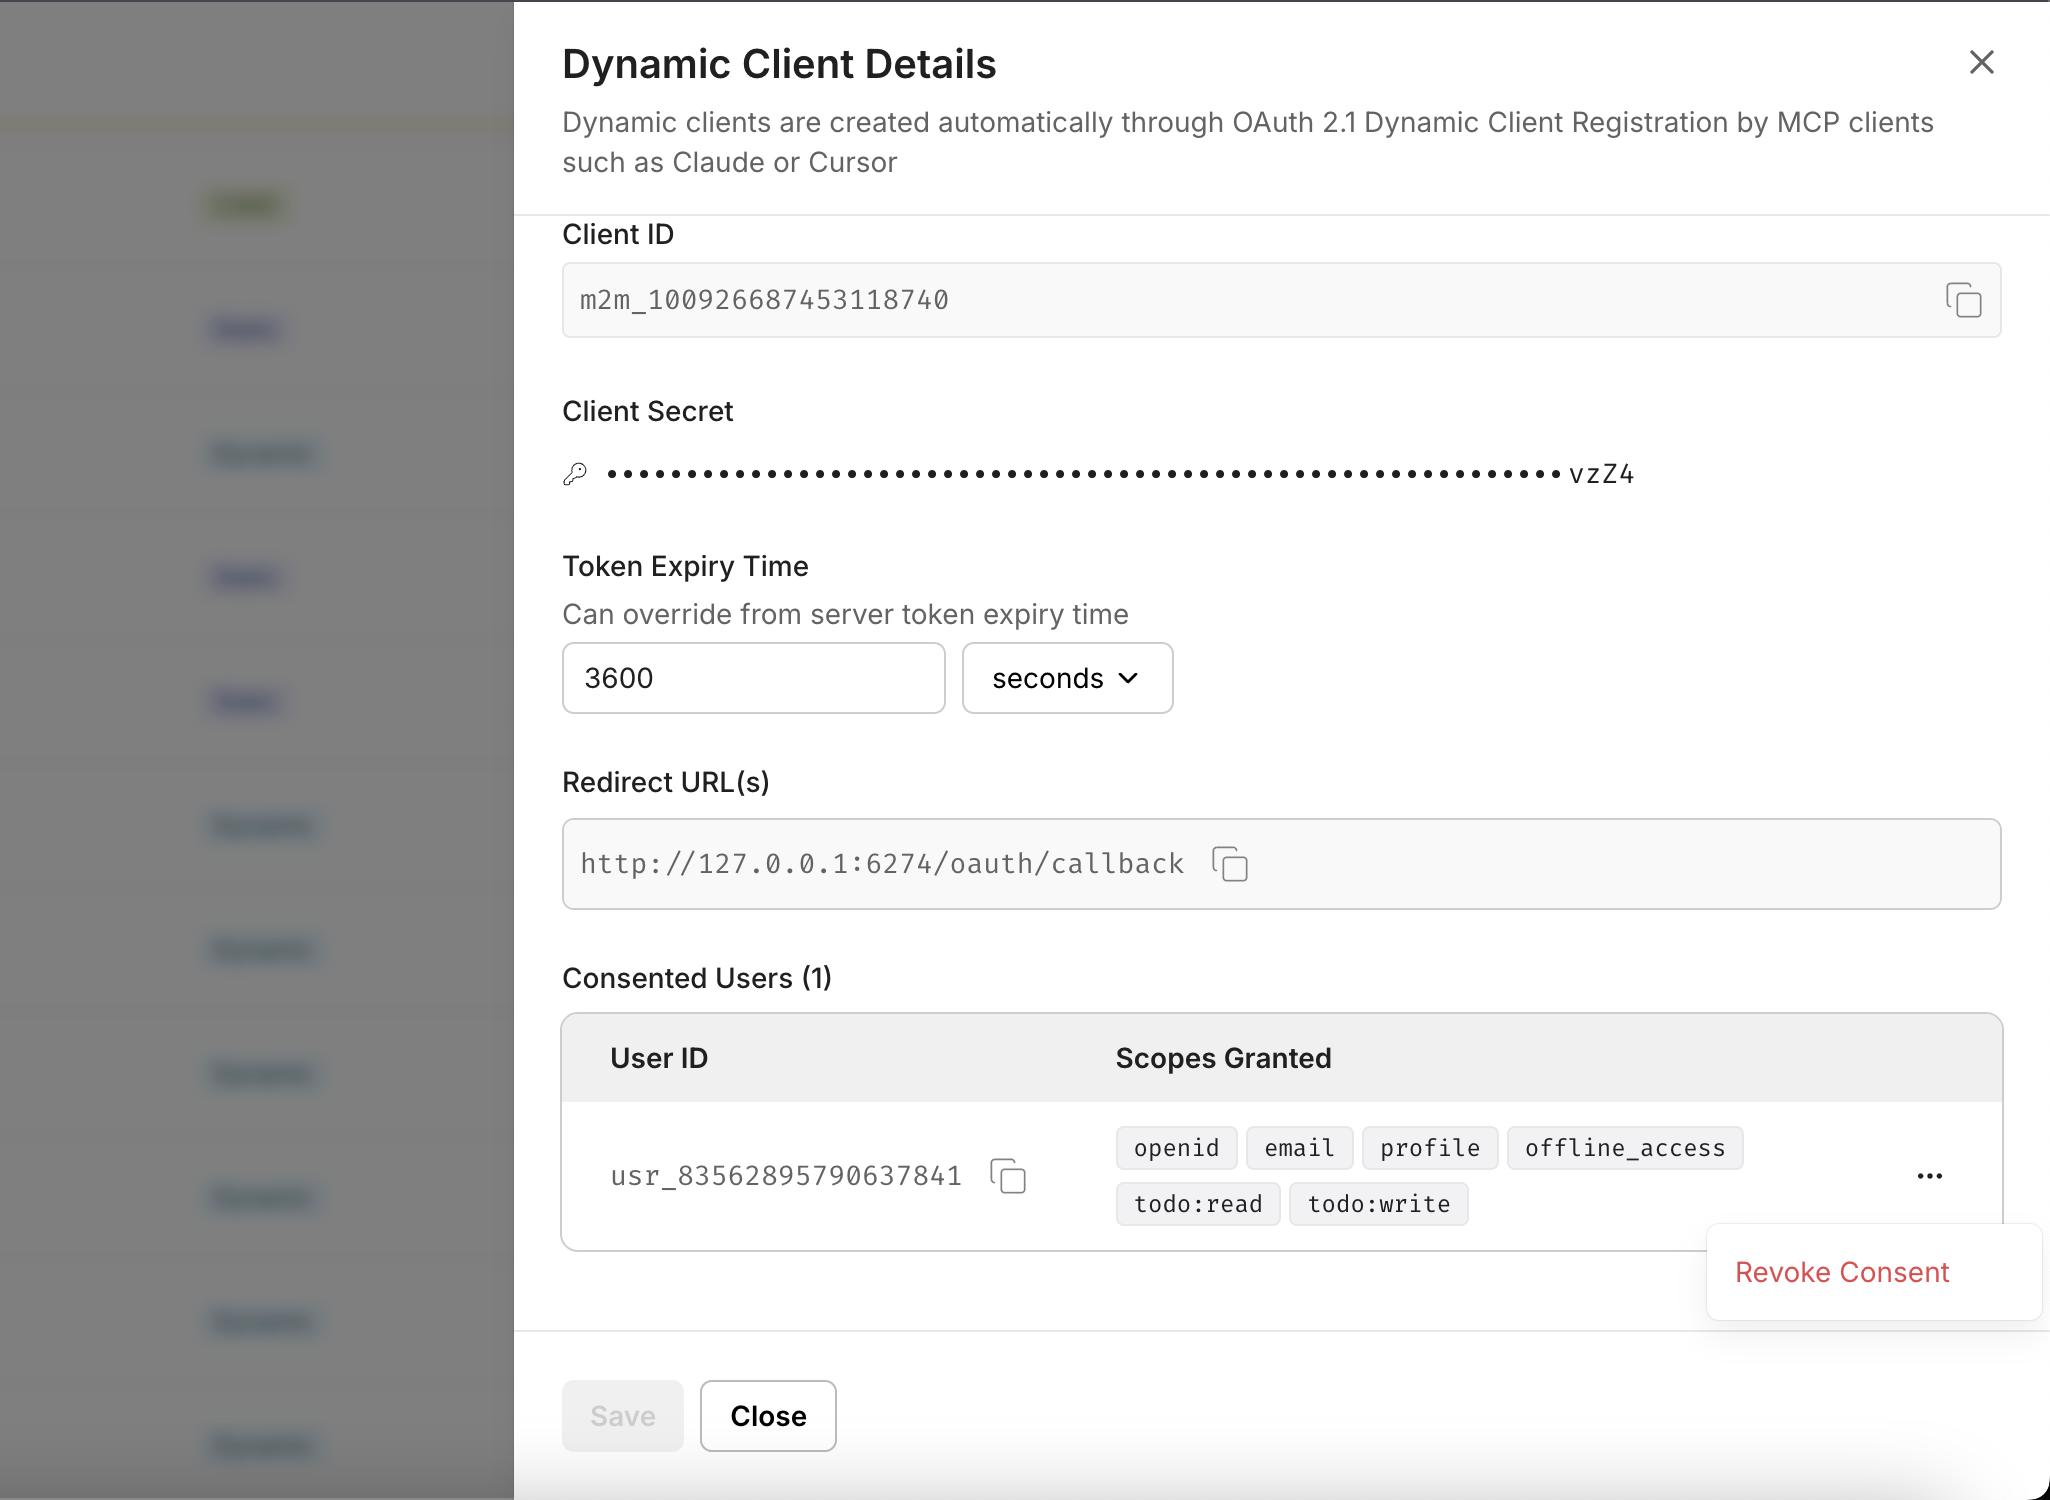
Revoke user access
Section titled “Revoke user access”As an administrator, you can revoke a user’s consent for a specific MCP Client at any time. This is useful when:
- A user requests to revoke access
- You need to remove access for security reasons
- An employee leaves the organization
- You want to force re-authentication
To revoke access:
- Navigate to the specific MCP Client from the Clients list.
- Go to the Consents tab.
- Find the user whose access you want to revoke.
- Click the Revoke or Delete action for that user.
Once revoked, the user will need to go through the authorization flow again to grant consent if they want to use the MCP Client.